Why Your Family Needs to Know How to Shut Off Water Main in Emergency
It's 2:47 AM on a Tuesday.
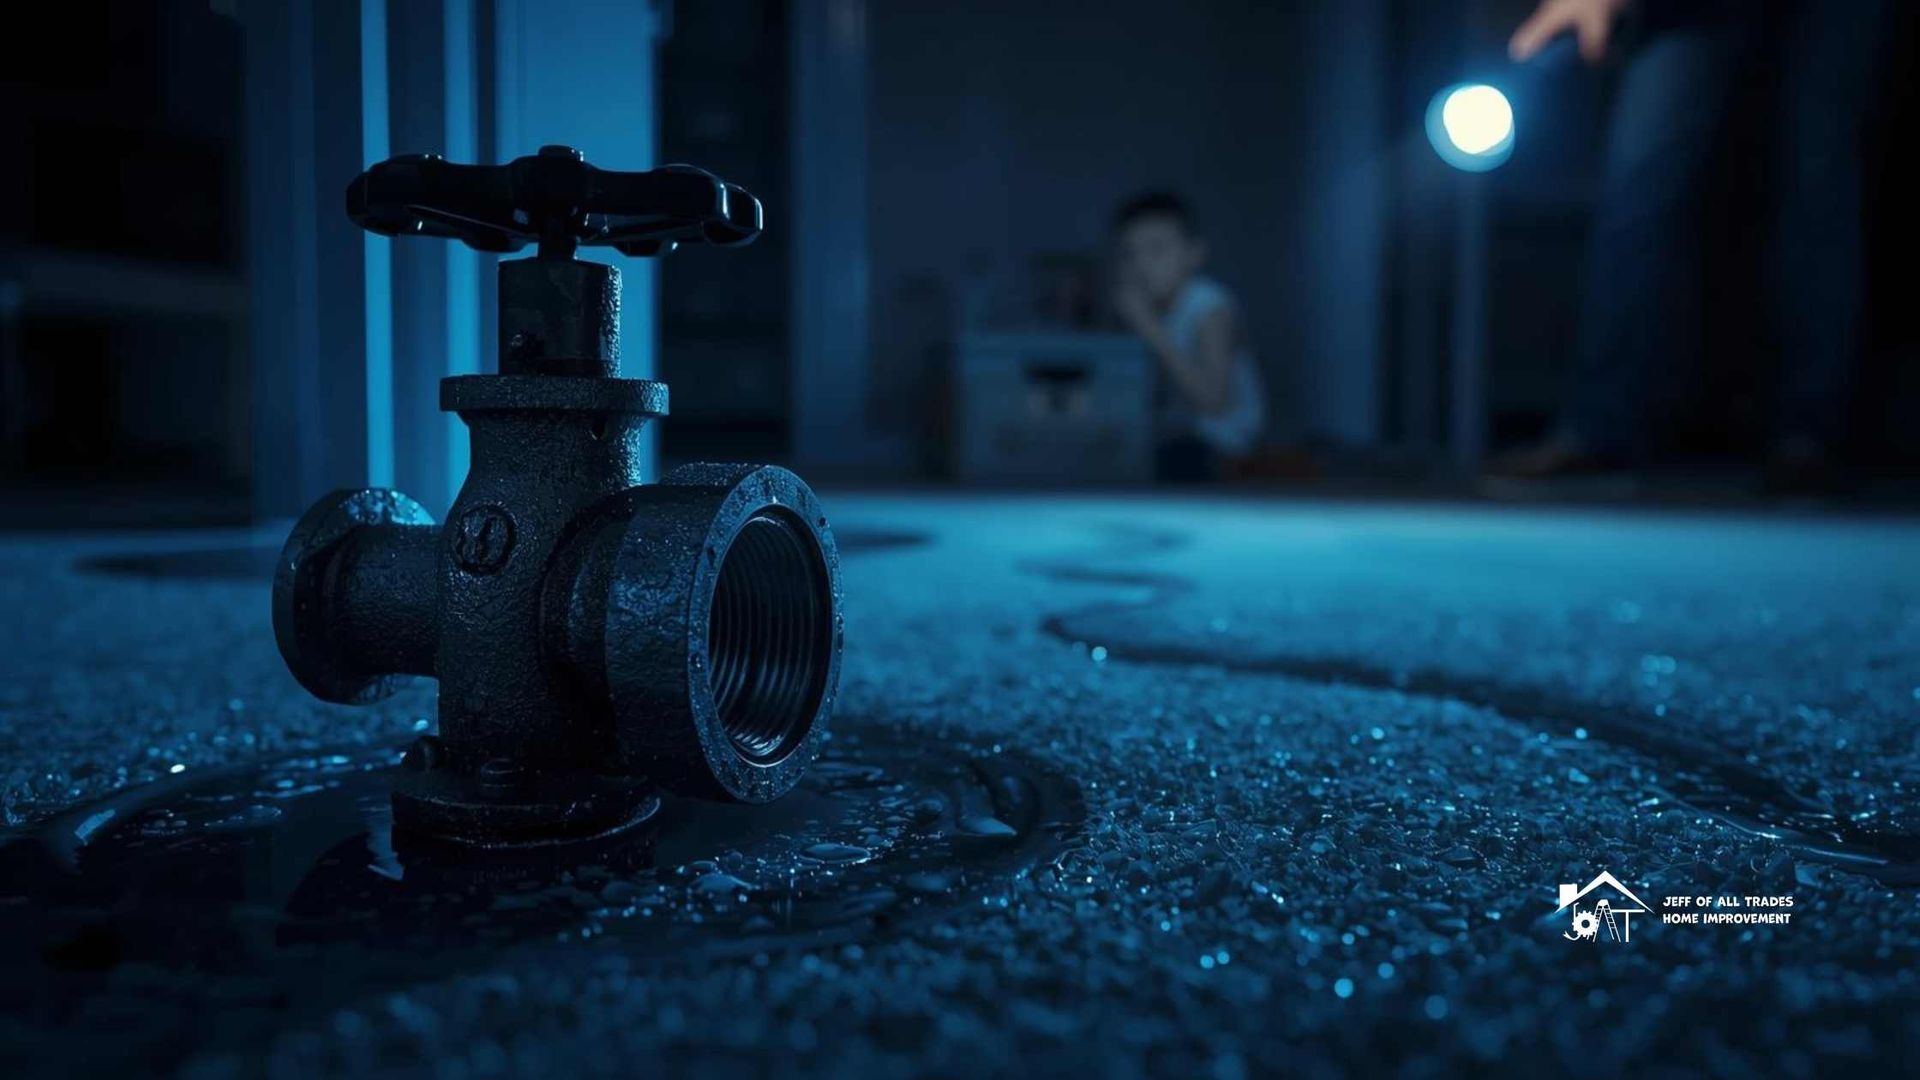
You wake up to a sound that doesn't belong: a hissing, rushing noise coming from somewhere in the house. Your feet hit the floor and immediately splash into cold water. Your heart drops as you realize the carpet is soaked, water is spreading quickly, and you have no idea where your main water shutoff valve is.
This isn't a nightmare. This is exactly what happened to the Morrison family in Toledo last winter when their washing machine supply line burst while they slept. By the time they figured out how to shut off the water to the house, their basement had three inches of standing water and $47,000 in damage.
It could have been prevented in 30 seconds if just one person had known where the valve was.
Here's the uncomfortable truth: Most American families have no idea where their water main shut-off valve is located. A 2024 survey by the National Association of Home Builders found that 68% of homeowners have never located their main water shutoff, and 82% have never tested it to confirm it works.
That's terrifying when you consider that home water damage costs Americans over $13 billion annually, and the majority of catastrophic water damage could be minimized or prevented with quick action, specifically, shutting off the water supply within the first few minutes.
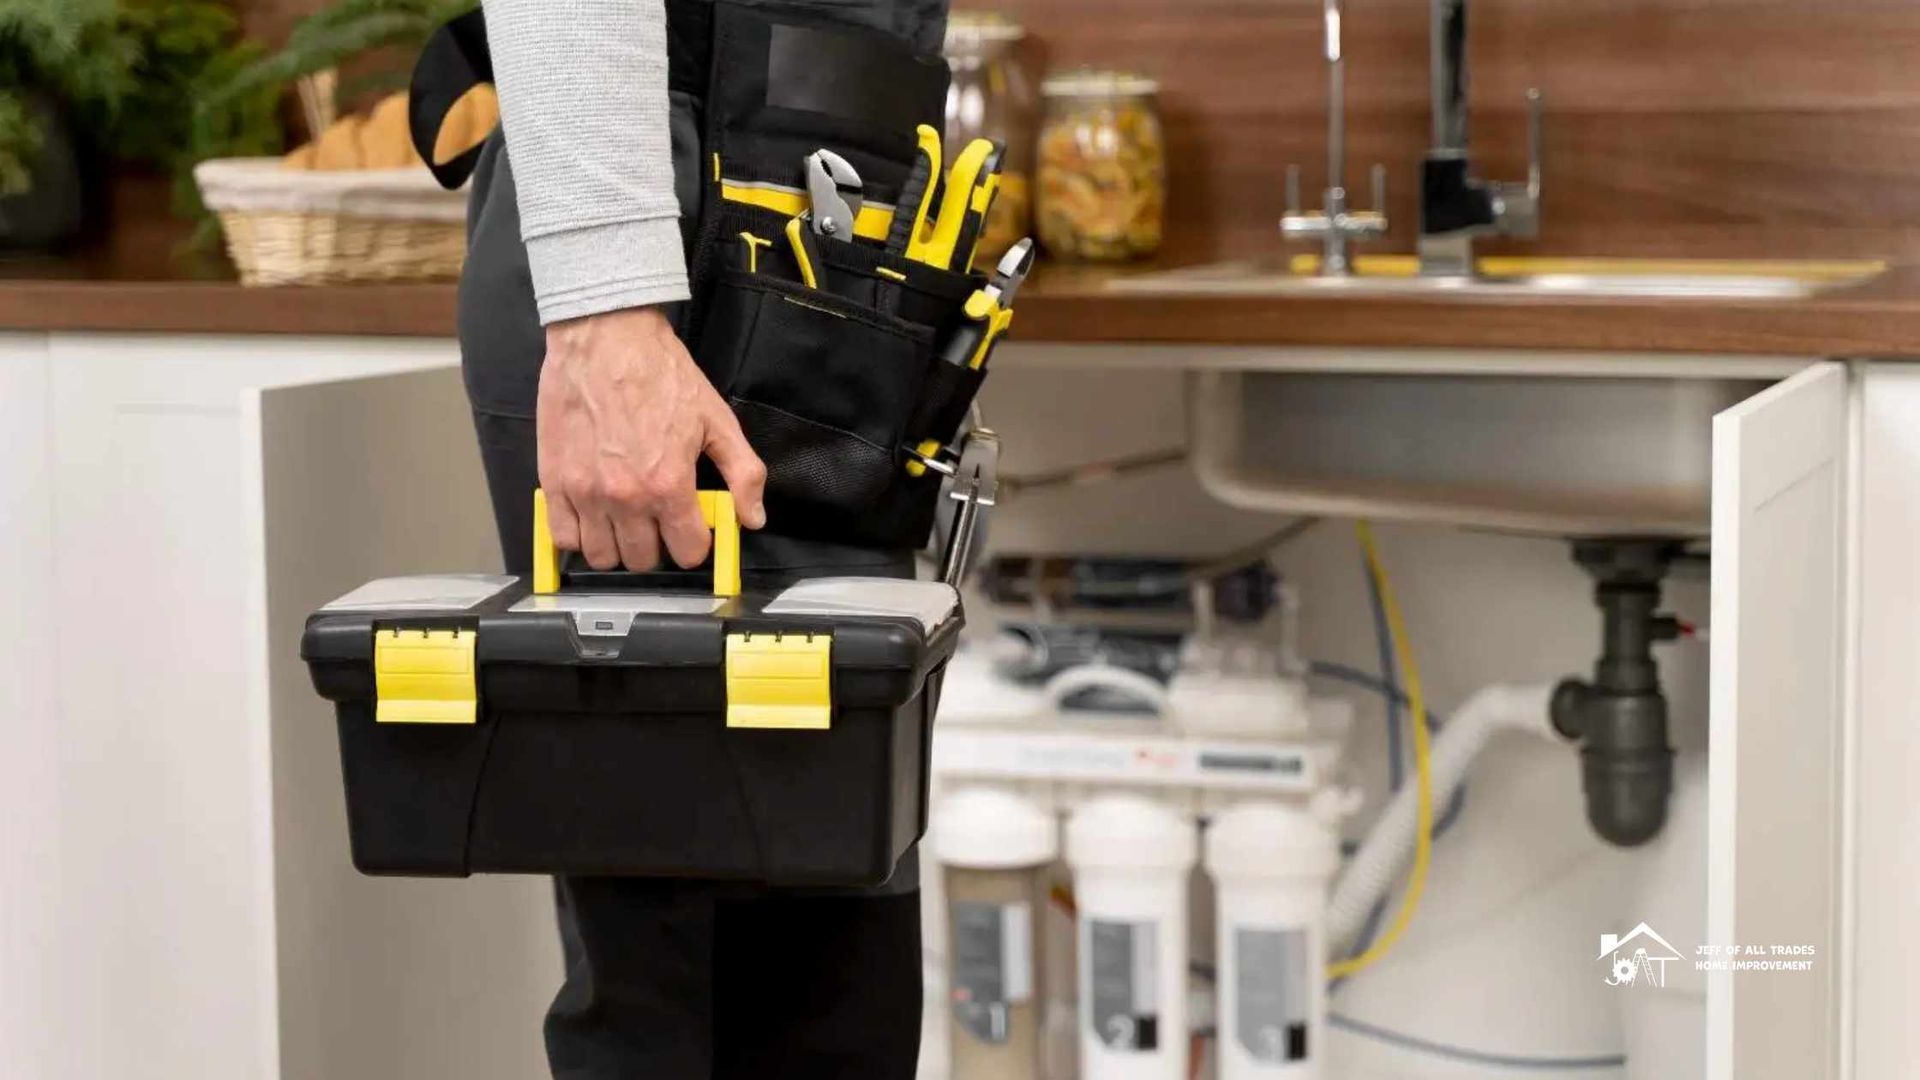
At Jeff's Home Improvement, we've responded to thousands of emergency plumbing calls over the past two decades. And I can tell you this: The difference between a $500 cleanup and a $50,000 insurance claim usually comes down to one thing: how quickly someone shut off the water.
This isn't just another home maintenance article you'll skim and forget. This is a family safety drill that could save you tens of thousands of dollars and weeks of stress. We'll walk through every emergency shutoff your family should know, where to find them, how to turn them on (it's not always obvious), and how to practice before disaster strikes.
By the end of this guide, every person in your household, including your teenager,s will know exactly what to do when water starts going where it shouldn't.
Let's make sure your family never has the Morrison's 2 AM experience.
Why This Matters More Than Your Smoke Detector Test
Everyone knows to test smoke detectors twice a year. Most families have fire escape plans. Some even practice tornado drills.
But emergency plumbing preparedness? Nobody thinks about it until water is actively destroying their home.
Here's why you should care as much about water emergencies as fire emergencies:
- Water damage is far more common than fire. You're roughly 7 times more likely to experience significant water damage than a house fire. Yet we constantly drill on fire safety and ignore plumbing emergencies entirely.
- Speed matters exponentially. With water damage, every minute counts. Water spreading through your home doubles its area of damage roughly every 3-4 minutes. Shut off the source in one minute? Maybe $2,000 in damage. Take ten minutes to figure it out? Now you're looking at $20,000+.
- It's usually preventable. Unlike natural disasters, most home flooding from plumbing failures is 100% preventable if you know your shut-offs. That burst pipe, failed water heater, or broken toilet supply line? All can be stopped immediately if you know what to do.
- Insurance deductibles are high. Most homeowner policies have deductibles of $2,500- $ 5,000 for water damage. Minor flooding: you could have stopped in 30 seconds; it might not even be covered after your deductible. Major flooding will spike your premiums for years.
- The emotional toll is brutal. I've watched families break down when they realize their wedding photos, kids' baby books, and grandfather's handmade furniture are ruined. Water doesn't just damage stuff; it destroys irreplaceable memories.
- Think of shutting off the water main in an emergency as your financial and emotional insurance policy. It costs nothing, takes 20 minutes to learn, and could save everything.
The Main Event: Finding and Operating Your Main Water Shut-Off Valve
This is the big one, the nuclear option. The master shutoff valve stops all water from flowing into your house.
Every single member of your family who is old enough to turn a valve (usually age 10+) should know exactly where it is and how to use it. Not "sort of know" or "think it's somewhere in the basement." They should be able to walk directly to it blindfolded.
Where Is My Water Main Shut Off Valve? The Detective Work
Your main shut-off location depends on your home's age, climate, and construction type. Let's find yours:
For homes with basements or crawl spaces:
The valve is usually on an exterior wall facing the street, within 3-5 feet of where the water line enters the foundation. Look at the front of your house; the water main typically enters on the side closest to the street or at the location of the water meter outside.
Go to your basement and find that corresponding wall. Look for a pipe (typically 3/4" to 1" in diameter) running through the wall or floor near the ceiling. Follow that pipe a few feet, and you'll typically find the shut-off valve.
It's often near the water meter, the pressure regulator, or the water softener, if you have one. Check behind stored boxes, in utility closets, or near the furnace area.
For homes on concrete slabs (no basement):
Your shut-off is likely in the garage, utility room, or outside near the water meter. In warm climates, it may be in an exterior wall access panel or in an underground box in your yard.
Check the garage walls, especially near the water heater. Look in the utility/laundry room near where pipes enter. Some newer homes have it in a hallway closet or pantry.
For homes in cold climates:
The valve must be installed indoors, where it won't freeze, typically in the basement near the front wall or in a heated utility room. It will never be in an unheated space or outside.
For homes in warm climates (Arizona, Texas, Florida, Southern California):
You may have an exterior shutoff near the water meter, in addition to an interior one. The exterior is often in an underground box in your front yard between the street and the house.
Can't find it anywhere?
Call your water utility company; they can tell you standard locations for homes in your area. Or call Jeff's Home Improvement for its repair services, and we'll help you locate it (often for free during business hours). This is too important to give up on.
What Does the Main Water Shut-Off Valve Look Like?
There are two main types you'll encounter:
Gate Valve (older homes):
- Round handle that looks like a wheel or faucet
- Turns clockwise (righty-tighty) multiple rotations to close
- Usually brass or sometimes red
- Takes 5-10 full turns to close fully
- Common in homes built before 1990
Ball Valve (newer homes):
- Lever handle, often red or blue
- Quarter-turn operation (90 degrees)
- Turns perpendicular to the pipe when closed
- Much faster to operate (1-2 seconds)
- Common in homes built after 1990 or recently updated
How to know if it's closed:
- Gate valve: Handle won't turn anymore, feels tight
- Ball valve: Handle is perpendicular (sideways) to the pipe
How to Turn Off Water to the House: The Step-by-Step
Let me walk you through this like you're actually doing it right now:
Before the emergency (testing procedure):
- Alert everyone. Tell family members you're testing the shut-off toilets won't refill, and faucets won't work for a few minutes.
- Take a before photo. Snap a picture of the valve in the "ON" position. This helps you remember the correct orientation.
- Clear the area. Move any stored items blocking access. This valve must be immediately accessible in emergencies.
- Try turning it. Gate valve: Turn clockwise slowly but firmly. Ball valve: Turn the lever 90 degrees.
- Don't force it. If it won't budge, STOP. Forcing a corroded valve can cause it to break, creating a different emergency. More on this below.
- Test your work. Turn on a faucet upstairs. Water should run for a few seconds (draining from pipes), then stop. If water continues to flow, the valve isn't fully closed; keep turning the gate valves.
- Turn it back on. Gate valve: Counter-clockwise until fully open. Ball valve: Lever parallel to pipe. Don't leave it partially open, as this causes wear and tear.
- Check for leaks. After reopening, inspect around the valve for drips or wet spots. Small leaks after the operation are common with old valves.
During an actual emergency:
- Don't panic, just move. You know where it is because you practiced. Walk there quickly.
- Turn it off. Full clockwise for gate valves, 90-degree turn for ball valves.
- Open a faucet. After shutting off the main, open a faucet to drain any remaining water from the pipes. This reduces pressure.
- Check the problem area. Now that the new water has stopped flowing, assess the damage and source.
- Call for help. With the water shut off, you can take a breath and call Jeff's Home Improvement for emergency repairs. You've already prevented 90% of potential damage.
Long-term solution:
If your main valve is seized, don't wait for an emergency. Call a plumber to replace it. At Jeff's Home Improvement, we can replace a main shut-off valve in 2-3 hours for $300-600, depending on accessibility. That's cheap insurance compared to the cost of flood damage.
Prevention tip: Exercise your main valve twice a year. Turn it off and back on during spring and fall maintenance. This prevents corrosion from seizing it when you actually need it.
The Family Emergency Drill: Making This Second Nature
Knowledge without practice is just theory. Let's turn this into muscle memory for your whole family.
How to Run Your Emergency Water Shut-Off Drill
Pick a Saturday morning when everyone's home. Make it non-negotiable like a fire drill. Here's your script:
Step 1: The Family Meeting (10 minutes)
Gather everyone age 10 and up. Explain that water emergencies are common and costly, and that knowing what to do can help protect the house.
Show them statistics: "The average burst pipe causes $5,000-20,000 in damage, but only if nobody knows how to shut off the water. If we shut it off in the first minute, damage is usually under $500."
Make it real: "What would you do if you woke up at night and the bathroom was flooding? Would you know what to do?"
Step 2: The Scavenger Hunt (15 minutes)
Make a checklist and have family members find:
- Main water shut-off valve
- Water meter location
- Water heater shut-off
- Each toilet shut-off
- Under-sink shut-offs (at least 2)
- Washing machine shut-offs
- Outdoor hose bib shut-offs
The first person to find each one gets a small prize (seriously, make it fun for kids/teens). Take photos of each location with everyone pointing at the valves.
Step 3: The Operation Test (15 minutes)
Each person old enough physically turns each valve:
- Main shut-off (turn off, wait, turn on)
- One toilet shut-off (turn off, flush toilet to verify, turn on)
- One sink shut-off (turn off, try faucet, turn on)
Watch their technique. Correct mistakes. Make sure they know lefty-loosey, righty-tighty doesn't always apply (some valves are opposite).
Step 4: The Scenario Practice (10 minutes)
Give scenarios and have family members walk through steps:
"You hear water running in the bathroom at night. What do you do?"
- Check the source
- If it's a toilet issue, shut off the toilet valve
- If it's bigger, shut off the main valve
- Call parents/911/plumber depending on severity
"The water heater in the basement is leaking. What's the order of operations?"
- Shut off the water supply to the heater
- Shut off power/gas to the heater
- Shut off the main if the leak is severe
- Call for help
Practice until responses are automatic.
Step 5: The Emergency Kit Check (10 minutes)
Create or update your emergency plumbing kit (keep near main shut-off):
- Flashlight with fresh batteries
- Adjustable wrench
- Pipe wrench
- Bucket
- Towels/rags
- Plumber's tape
- Jeff's Home Improvement emergency number is programmed in phones
- Printed list of all shut-off locations
- Photos of valves in "closed" position
Make It Stick: Quarterly Refreshers
Every three months, do a 5-minute refresh:
"Pop quiz: show me the main water shut-off."
"What do you do if the washing machine is flooding?"
"Where's the water heater shut-off?"
Quick refreshers prevent knowledge fade. This stuff needs to be automatic, not something they have to think about during chaos.
Common Emergency Scenarios and Your Response Plan
Let's walk through real situations so you know exactly what to do:
Scenario 1: Burst Pipe Behind the Wall
Signs: Water staining on walls/ceiling, water sound inside walls, wet carpet with no visible source.
Response:
- Shut off the main water valve immediately
- Turn off electricity to the affected area (water + electricity = danger)
- Move valuables away from water
- Place buckets under any drips
- Take photos for insurance
- Call Jeff's Home Improvement emergency line
- Start documenting damage
Don't: Try to fix it yourself, ignore "small" leaks, or delay shutting off water to "see if it gets worse."
Scenario 2: Water Heater Leak
Signs: Water pooling around the water heater base, pressure relief valve discharge, rusty water.
Response:
- Shut off the water supply to the heater (cold water inlet valve)
- Shut off the power source (electric breaker or gas valve)
- Open a hot water faucet to relieve pressure
- If the leak is major, also shut the main water valve
- Don't use hot water until it's repaired
- Call a professional immediately
Don't: Ignore small leaks (they get bigger), relight the gas pilot if you smell gas, or touch the electric heater in standing water.
Scenario 3: Toilet Overflow
Signs: Water rising in the toilet bowl, overflowing onto the bathroom floor.
Response:
- Don't flush again (makes it worse)
- Remove the tank lid and push down the flapper to stop more water from entering the bowl.
- Shut off the toilet supply valve behind the toilet
- Use a plunger if it's just a clog
- Mop up water immediately to prevent subfloor damage
- If the shut-off valve won't work or the problem persists, shut the main valve
Don't: Keep flushing, hoping it'll clear, ignore it and leave the room, or pour Drano in the toilet (call a plumber instead)
Scenario 4: Washing Machine Hose Burst
Signs: Water spraying from behind the washing machine; sudden, large water leak in the laundry room.
Response:
- Shut off the washing machine valves behind the unit (both hot and cold)
- Unplug the washing machine
- If valves won't close or you can't reach them, shut the main valve
- Move wet items away from water
- Start water extraction immediately (shop vac, towels, fans)
- Replace the burst hose with a braided steel version
Don't: Wait for the cycle to finish, attempt to move the machine while water is running, or reuse old rubber hoses after a burst.
Scenario 5: Supply Line Leak Under Sink
Signs: Wet cabinet bottom, water dripping from under the sink, swollen cabinet materials.
Response:
- Shut off both valves under the affected sink
- Place the bucket under the leak
- Empty the cabinet to prevent damage to stored items
- Check if the leak stops (confirms it's that fixture)
- Replace the supply line or call a plumber if valve replacement is needed
- Dry the cabinet thoroughly to prevent mold
Don't: Put stuff back in a wet cabinet, ignore "slow" leaks, or overtighten connections trying to stop leaks (can make it worse)
The Pre-Vacation Checklist: Prevent Disasters While You're Away
Going on vacation? Take these steps to prevent coming home to a disaster:
One week before:
- Exercise the main shut-off valve (turn off and on) to verify it works
- Check under all sinks for moisture or supply line wear
- Inspect the water heater for any rust or moisture
- Look at washing machine hoses for cracks or bulges
- Test all fixture shut-offs for functionality
Day of departure:
- Shut off the water supply to the washing machine
- Consider shutting the main water valve if it's been off for more than a week (especially in winter)
- Set thermostat to 55°F minimum (prevents frozen pipes)
- Ask a trusted neighbor to check the house mid-trip
- Make sure the neighbor has emergency contacts, including Jeff's Home Improvement
Winter vacation additions:
- Shut off and drain outdoor hose bibs
- Open cabinet doors under sinks to allow warm air circulation
- Consider draining pipes if going to be gone during severe cold
- Never set the thermostat below 55°F
When to Call the Pros: Don't Be a Hero
Some things are DIY-friendly. Some things need professionals. Know the difference:
Call Jeff's Home Improvement immediately for:
- The main shut-off valve won't close
- Active water heater leak
- Burst pipe in the wall or ceiling
- Sewage backup
- Any leak you can't stop at the fixture level
- Gas line issues (shut off gas AND call immediately)
- Any water emergency where you've shut the main but need immediate repair
Time-sensitive matters:
Water emergencies worsen exponentially. That "small" leak can become catastrophic in hours. At Jeff's Home Improvement, we offer 24/7 emergency service because we know waiting until Monday morning can cost you tens of thousands in additional damage.
Our emergency response includes:
- Within 60 minutes of arrival for true emergencies
- Water extraction and emergency mitigation to prevent mold
- Source identification and repair
- Coordination with insurance if needed
- Follow-up inspection to ensure no hidden damage
Don't wait to call. Insurance companies view delayed responses unfavorably; they expect you to mitigate damage immediately. Shutting off water is step one; professional repair is step two, not step "maybe next week."
The Investment That Pays for Itself: Preventive Upgrades
If your home has old valves or problematic shut-offs, consider these upgrades:
Main Shut-Off Replacement ($300-600)
Worth every penny if your current valve is 20+ years old, hard to turn, or hasn't been tested recently. New ball valves shut off in seconds and last for decades.
Fixture Shut-Off Valve Upgrades ($40-80 per fixture)
Those crusty old valves under sinks and toilets that won't turn? Replace them before you need them in an emergency.
Pressure Regulator Installation ($350-500)
If your home water pressure exceeds 80 PSI, you're at a much higher risk of pipe bursts and fixture failures. A regulator protects your entire system.
Whole-House Water Alarm System ($200-600)
Sensors placed near water heaters, washing machines, and under sinks alert you to leaks before they become disasters. Some even connect to your phone.
Automatic Water Shut-Off System ($800-2,000)
These systems detect unusual water flow patterns and automatically shut off your main valve. Worth considering for vacation homes or if elderly family members are home alone.
Jeff's Home Improvement can assess your home's specific needs and recommend the most cost-effective preventive measures. An hour of prevention is worth weeks of restoration.
Your Action Plan: Do This Today
Reading this article means nothing if you don't act on it. Here's what to do in the next 24 hours:
Today, right now:
- Put down your phone/device and find your main water shut-off valve
- Take a photo of it in the open position
- Try turning it off (if it won't budge easily, DON'T force it, call a plumber)
- Turn it back on
This weekend:
- Schedule the family emergency drill from this article
- Create your emergency plumbing kit
- Test all fixture-level shut-offs
- Make a list of any valves that are hard to turn or appear corroded
- Take photos of all shut-off locations and save them in a dedicated album on your phone
This month:
- Call Jeff's Home Improvement to replace any seized or corroded valves
- Consider upgrading to ball valves for the main and water heater shut-offs
- Replace rubber washing machine hoses with braided steel
- Install a water alarm if you have a finished basement or valuable items near water sources
- Add "water shut-off drill" to your quarterly family calendar
The Bottom Line: 30 Minutes of Practice Can Save $50,000 in Damage
We've covered a lot, but the core message is simple:
Every family member should know how to shut off the water main in an emergency. Full stop.
You practice fire drills even though house fires are relatively rare. Water emergencies are seven times more common and just as destructive. The knowledge takes 30 minutes to learn and could save your home.
At Jeff's Home Improvement, we've seen too many families devastated by water damage that could have been minimized with quick action. We've also seen relief and gratitude on homeowners' faces when they confidently shut off the water within the first 60 seconds, preventing disaster.
Be the second family, not the first.
Take the action steps. Run the drills. Test your valves. Create the emergency kit. Program our number in your phone.
Because someday, maybe next month, maybe in ten years, you'll wake up to the sound of water where it shouldn't be. And instead of panic, you'll have confidence. Instead of fumbling in the dark, you'll walk directly to that shut-off valve you've practiced on. Instead of tens of thousands in damage, you'll have a minor cleanup and a good story to tell.
That's the power of emergency plumbing preparedness.
Now locate the main shutoff valve. Your future self will thank you.