

Tub-to-Shower Conversion Cost, Timeline and Design Choices in Somerset County
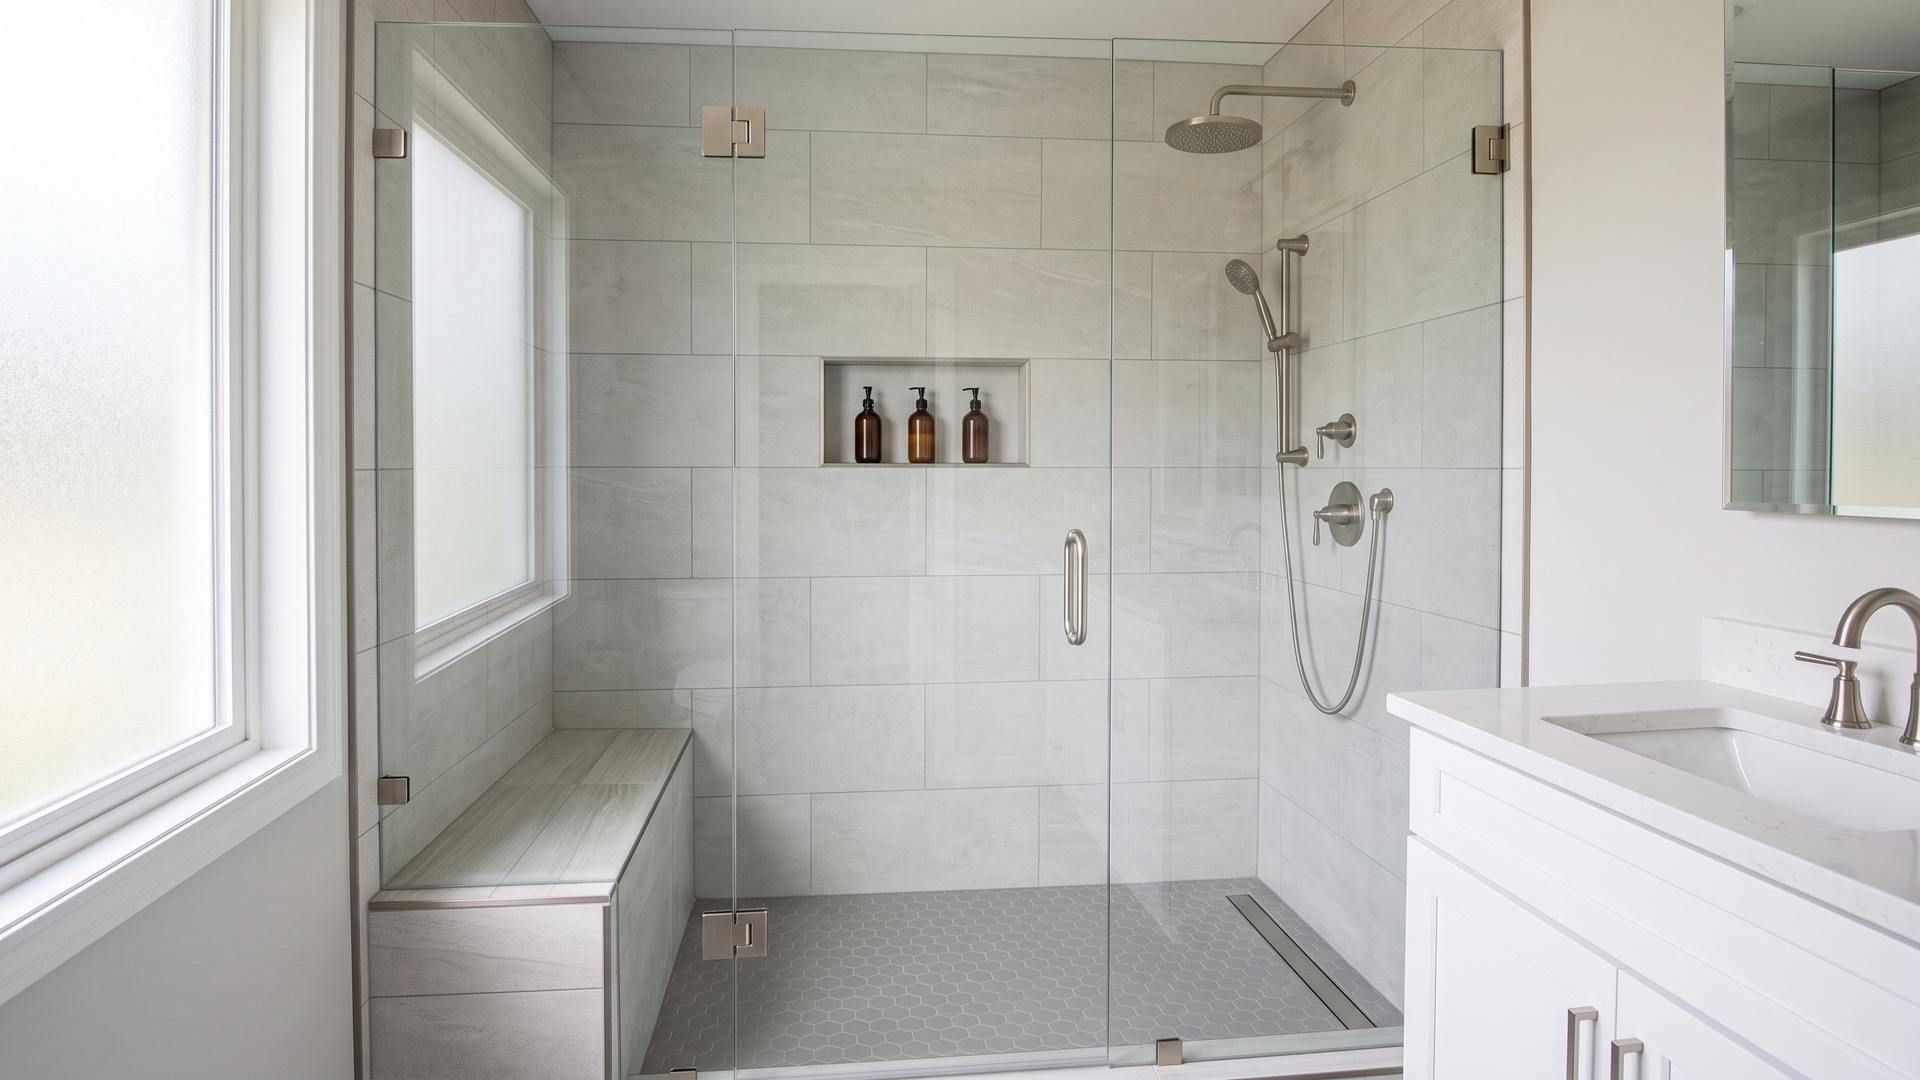
At a certain point, the bathtub stops earning its keep.
Instead of a relaxing escape, it becomes the thing you climb over every morning, half awake and trying not to slip, while your knees and back complain. In many households, that tub takes up a lot of space and rarely gets used for a bath.
A walk-in shower changes how the bathroom works. It is easier to get in and out of, it fits the way most people actually live, and it makes the room look current instead of dated.
The catch is that swapping a tub for a shower is not as simple as pulling one thing out and setting another in. Once the walls are open, you may find plumbing that needs to move, old water damage, permit requirements, and waterproofing steps that cannot be skipped or rushed. This guide focuses on cost, timeline and design choices; for the broader overview, see our companion tub-to-shower conversion guide.
If you live in Basking Ridge, Bedminster, Hillsborough, Warren, Bernardsville or elsewhere in Somerset County, here is what to know before anyone starts demolition.
Why So Many Homeowners Are Replacing the Tub
Walk-In Showers Are Simply Easier
A tub can feel like an obstacle course, especially if you have sore knees, back pain, limited mobility, or are recovering from surgery. You do not need to be retired to appreciate not climbing over a slippery ledge every day.
A low-threshold or curbless shower makes daily routines easier. You step in with no high tub wall and no balancing act, and once you are used to it, it is hard to go back.
Most People Rarely Use the Tub
When was the last time anyone in your house actually took a bath?
For many homeowners, the tub becomes a storage spot for shampoo bottles, bath toys and nearly empty products. Meanwhile, everyone showers in a space that feels tight, a little dark, and overdue for an update. Replacing that underused tub with a larger shower is a better fit for how most families live now.
A Modern Shower Can Change the Whole Room
A clean glass enclosure, warm tile, a rainfall showerhead, built-in storage and perhaps a bench give the bathroom a calm, hotel-like feel. You do not need a full renovation to make the space feel better; a well-designed shower can become the focal point of the room. If you are weighing a larger project, our bathroom remodeling team can help you decide how far to go.
What About Resale Value?
People used to say every home needed a bathtub, and in some cases that is still true. If you have only one bathroom or young children at home, keeping a tub is usually the practical choice.
If you have multiple bathrooms, removing the tub from the primary bath or a guest bath is usually less of a resale concern than people expect. Most buyers want a bathroom that feels fresh, functional and well put together. Where possible, keep one tub somewhere in the house; beyond that, a spacious walk-in shower can be a real selling point.
What Does a Tub-to-Shower Conversion Cost?
Costs vary widely depending on materials, plumbing work, and how custom you want to go. For a wider view of bathroom budgets in the area, see our 2026 Somerset County bathroom remodeling cost guide.
Basic Conversion: Around $4,500 and Up
This usually includes a standard acrylic shower base, simple wall panels or a surround, basic fixtures and installation. It is not a showroom bathroom, but it is clean, functional, and a major improvement over a worn-out tub.
Mid-Range Conversion: Roughly $8,000 to $12,000
This is where most homeowners land when they want something that looks good and holds up over time. Expect custom tile, better fixtures, a glass enclosure, proper waterproofing, built-in niches, and more attention to detail, without moving into full luxury territory.
Higher-End Projects: $15,000 and Up
Once you add premium tile or stone, frameless glass, heated floors, multiple showerheads, body sprays, a tiled bench, upgraded lighting or designer fixtures, the budget can climb quickly. For the right home it can be worth it; just make sure the investment fits the house and your long-term plans.
Takeaway: A hidden leak behind an old tub can turn a straightforward project into a larger repair. That is not necessarily anyone's fault; it is what happens when walls are opened after decades. Leave some room in your budget for surprises.
Why DIY Shower Builds Often Go Wrong
There are plenty of online videos showing people building a shower in a weekend. Showers, however, are one of those projects where a small mistake can cause a large problem later.
Waterproofing has to be done correctly, not "sealed enough" but truly waterproof. If water gets behind the tile, it can slowly damage studs, insulation, drywall and subflooring before you notice anything is wrong. At that point, an affordable DIY project becomes a mold remediation and rebuild.
What the Conversion Process Usually Looks Like
Step 1: Demolition
First, the old tub comes out. Acrylic and fiberglass tubs are often cut into pieces for removal, while cast-iron tubs are extremely heavy and take real effort to remove safely.
The walls around the tub are then opened so the framing, plumbing and any moisture damage can be inspected. Expect some dust; even with protective barriers, construction dust tends to travel.
Step 2: Plumbing and Framing
Next comes the work behind the walls. The drain may need to move, and the shower valve may need to be raised or replaced. Adding a handheld shower, rainfall head, body sprays or a bench can require additional plumbing and structural support.
Step 3: Waterproofing
This step separates a good shower from a future repair bill. Tile is not waterproof, and neither is grout; the membrane behind and beneath them is what protects your home.
Ask your contractor which system they use. Common options include Schluter-Kerdi, Laticrete Hydro Ban and RedGard. If a contractor cannot clearly explain how they waterproof a shower, treat that as a red flag.
Step 4: Tile and Finish Work
Tile layout matters more than most people realize. You want clean lines, balanced cuts, grout joints that align, and corners that look intentional. A rushed tile job shows, and our guide to small bathroom tile patterns covers layouts that work well in tighter spaces.
Step 5: Glass and Fixtures
Finally, the shower takes shape. Frameless glass gives the cleanest, most open look, while semi-frameless options can still look sharp for less. Then come the showerheads, handles, shelves, lighting, mirrors and hardware finishes. If you are choosing new fixtures, our water-saving bathroom fixtures guide is worth a look.
Design Details That Make a Shower Worth the Upgrade
Acrylic Base or Tile Floor?
One of the first decisions is whether to use an acrylic shower base or a custom tile floor. Neither is automatically better; it depends on what matters most to you.
An acrylic base suits homeowners who want something clean, practical and easy to maintain. It is durable, simple to clean, and usually more budget-friendly, which makes it a popular choice for a straightforward conversion.
A custom tile floor offers more design freedom. You can set the size, shape, drain location and overall look, and it gives the bathroom a more tailored, spa-like finish. It costs more, but for homeowners who want a custom result, it is often worth it.
Think About Safety When Choosing Floor Tile
Polished marble looks beautiful in a showroom, but it can be slippery once wet, which makes it a poor choice for a shower floor. Textured porcelain, smaller mosaic tile, or anything with more grip is usually the better option.
If you love a glossy, dramatic tile, use it on the walls. You still get the visual impact without making the shower floor a slip hazard.
Do Not Skip the Built-In Storage
A shower niche seems like a small detail, but you will use it every day. It gives shampoo, conditioner and soap a proper home instead of the floor or a corner caddy that eventually rusts or falls.
Plan niches before the walls are finished. If more than one person uses the shower, consider two niches or placing them at different heights.
Somerset County Considerations to Keep in Mind
Permit Requirements Can Vary by Town
Each town handles renovation permits in its own way, so what applies in Basking Ridge may not apply in Bedminster, Hillsborough, Warren, Bernardsville, Far Hills or Gladstone. If your project involves moving plumbing or changing the shower layout, you will likely need a permit, and inspections may be required before the walls are closed and again when the work is finished. Our overview of which NJ projects need building permits explains the basics.
Water Pressure Can Affect Your Shower Design
If you want a rainfall head, body sprays and multiple outlets, check your water pressure first. Some homes may not have enough pressure for all of those features to perform as expected. A booster pump can help, but it adds cost, so it is better to know before you choose fixtures.
Older Homes May Need More Work
Somerset County has many older homes with real character. Once the walls are open, though, you may find aging pipes, older wiring, uneven floors, undersized framing, or moisture that has been hidden behind the tub for years.
That is not a reason to put the project off. It simply helps to work with a contractor experienced with older homes, who expects surprises and communicates clearly when something needs to be addressed.
Mistakes to Avoid
The mistakes below are the ones we see most often in shower projects; our article on bathroom remodeling mistakes in small bathrooms covers more.
Choosing the Lowest Estimate Without Looking Deeper
The cheapest quote is not always the best value. A low price can mean shortcuts on waterproofing, inexperienced tile work, missing permits, lower-quality materials or no insurance. Ask for a clear, itemized proposal rather than a single number.
Forgetting the Bathroom Will Be Out of Service
Most conversions take one to three weeks depending on scope, as outlined in the timeline below. If it is your only bathroom, make a plan before work starts rather than on day three, when the room is unavailable and the crew is on site.
Forgetting About Ventilation
A new shower will not last as well if the bathroom stays damp for hours. A properly sized exhaust fan keeps moisture under control, helps prevent mold, protects your finishes, and keeps odors down. If your current fan barely moves air, replace it while the work is underway; our guide to bathroom ventilation upgrades explains what to look for.
Updating the Shower but Leaving Everything Else Behind
A striking new shower next to worn yellow vinyl flooring, an old vanity and a dated mirror from the 1990s will look out of place. You do not need to redo the whole bathroom now, but think about where you are headed and choose finishes that will not clash when you update the rest later.
The Materials You Choose Really Do Matter
It is easy to focus on the visible choices: tile, glass and fixtures. Some of the most important decisions, however, are ones you will barely notice once the project is finished.
Inexpensive materials can look fine when new. The problems show up later, when finishes wear off, grout stains, or a showerhead looks worn well before it should. You do not need top-of-the-line everything, but spend on materials that can handle daily use. Mid-range porcelain tile is a sensible choice because it is durable, low maintenance, and available in almost any look. Fixtures from established brands tend to have more durable finishes, and replacement parts are easier to find.
Here is what matters most:
- Porcelain tile: Holds up to heavy use and keeps its appearance, which suits busy bathrooms.
- Epoxy grout: Costs more up front, but it is highly stain resistant and far easier to keep clean.
- 100% silicone caulk: Use it anywhere water hits or where two surfaces meet, since it stays flexible and water resistant.
- Chrome and brushed nickel: Popular because they wipe clean easily and hide water spots well.
- Matte black: Looks striking, but fingerprints, soap residue and hard water spots show clearly, so expect to wipe it often.
Takeaway: Save money where it will not cost you later, but never cut corners on waterproofing, plumbing parts, grout, or anything that goes inside the walls. That is what keeps a shower performing long after the project is finished.
How Long Does a Tub-to-Shower Conversion Take?
For a fairly straightforward conversion, expect about seven to ten business days. Custom tile, a built-in bench, plumbing changes, frameless glass, or repairs found once the walls are open can stretch the project to two to three weeks. That is not always because something went wrong; waterproofing, tile setting, grout curing, inspections and glass installation all take time.
A typical schedule may look like this:
- Days 1 to 2: Remove the old tub and inspect what is behind the walls.
- Days 3 to 4: Handle plumbing and framing adjustments, and install the shower base.
- Days 5 to 7: Waterproof the space and begin tile installation.
- Days 8 to 10 and beyond: Grout, install fixtures and glass, and finish the final details.
What matters most is working with a contractor who is upfront about the timeline, communicates when plans change, and does not leave you wondering what is happening for days at a time.
Final Thought
A tub-to-shower conversion makes a difference right away. The bathroom feels more open, the space works better for everyday life, and the awkward morning climb over the tub is gone.
The key is not rushing the details. Choose finishes you will still like a few years from now, keep some flexibility in your budget, and work with a contractor who understands waterproofing, permits, and the surprises that can come up in older Somerset County homes. When you are ready to plan your conversion, contact Jeff of All Trades to talk through your bathroom.