Quick Faucet Fixes That Stop Leaks and Save Gallons Daily
That constant drip, drip, drip from your faucet isn't just annoying—it's literally money going down the drain. A faucet that drips just once per second wastes over 3,000 gallons of water every year. That's enough water to take more than 180 showers. In New Jersey, where water isn't cheap, that leak could cost you an extra $50-100 annually, and that's just from one dripping faucet.
The good news? Most leaky faucets are easy to fix yourself in under an hour. You don't need to be a plumber or own a truck full of specialized tools. With a few basic supplies from your local hardware store and some straightforward instructions, you can stop that leak today and start saving water and money immediately.
I'm Jeff, and I've been fixing faucets and handling all kinds of home repairs across Somerset County for years. I've seen every type of faucet problem you can imagine—from slow drips that homeowners ignore for months to full-blown gushers that flood kitchen cabinets. Through my work with Jeff's Home Improvement, I've helped hundreds of homeowners in Basking Ridge, Hillsborough, Bernardsville, and surrounding areas tackle these issues. Today, I'm sharing exactly how to fix a leaky faucet so you can handle it yourself or at least understand what needs fixing before calling a professional.
Why Faucets Start Leaking
Before we get into repairs, let's talk about why faucets leak in the first place. Understanding the problem makes the fix a lot easier.
Most faucet leaks happen because of worn-out internal parts. Your faucet gets used dozens of times every day. All that turning on and off wears down the washers, O-rings, and seals inside. These small rubber or plastic parts create watertight seals, and when they wear out, water starts sneaking through.
Hard water makes this worse. If you live in areas of New Jersey with high mineral content in the water, those minerals build up on faucet components, accelerating wear. The calcium and lime deposits act like sandpaper on the moving parts.
Sometimes the problem is corrosion. Metal parts inside the faucet can corrode over time, especially in older homes. Once corrosion starts eating away at valve seats or other components, you get leaks.
Loose parts are another common culprit. The packing nuts and adjusting rings inside faucets can work themselves loose over time. When these parts aren't snug, water leaks out.
High water pressure can cause or worsen leaks, too. If your home's water pressure is too high (above 80 PSI), it puts extra stress on all your plumbing fixtures, including faucets. That pressure beats up the internal seals faster than normal.
The Four Main Types of Faucets
Not all faucets are built the same. There are four basic types, and knowing which one you have determines how you fix it.
Compression Faucets: These are the old-school faucets with separate hot and cold handles that you twist to turn on. When you turn the handle, you're literally compressing a washer down onto a valve seat to stop water flow. These are the most prone to leaking because those rubber washers wear out regularly. If your faucet has two handles and you can feel resistance when turning them, you've got a compression faucet.
Ball Faucets: Common in kitchens, these have a single handle that moves over a rounded ball-shaped cap. The ball inside has chambers and springs that control water flow and temperature. You can spot these by the single handle and the rounded cap at the base of the spout. Delta popularized this design.
Cartridge Faucets: These can have either one or two handles. Inside is a cartridge (a cylindrical mechanism) that moves up and down or side to side to control water. The motion is smooth, with no compression. Moen and other manufacturers use cartridge designs extensively. These are pretty reliable, but the cartridges do eventually wear out.
Ceramic Disk Faucets: The newest and most durable design. These have a single lever over a wide cylindrical body. Inside are two ceramic disks that slide over each other to control water flow. These rarely leak, but when they do, you usually need to replace the whole cartridge. They're common in newer homes and high-end fixtures.
Figuring out which type you have is step one. Look at your faucet—how many handles does it have? How does it feel when you operate it? Check the manufacturer's name if you can find it. Once you know the type, you know what parts to buy and how to take it apart.
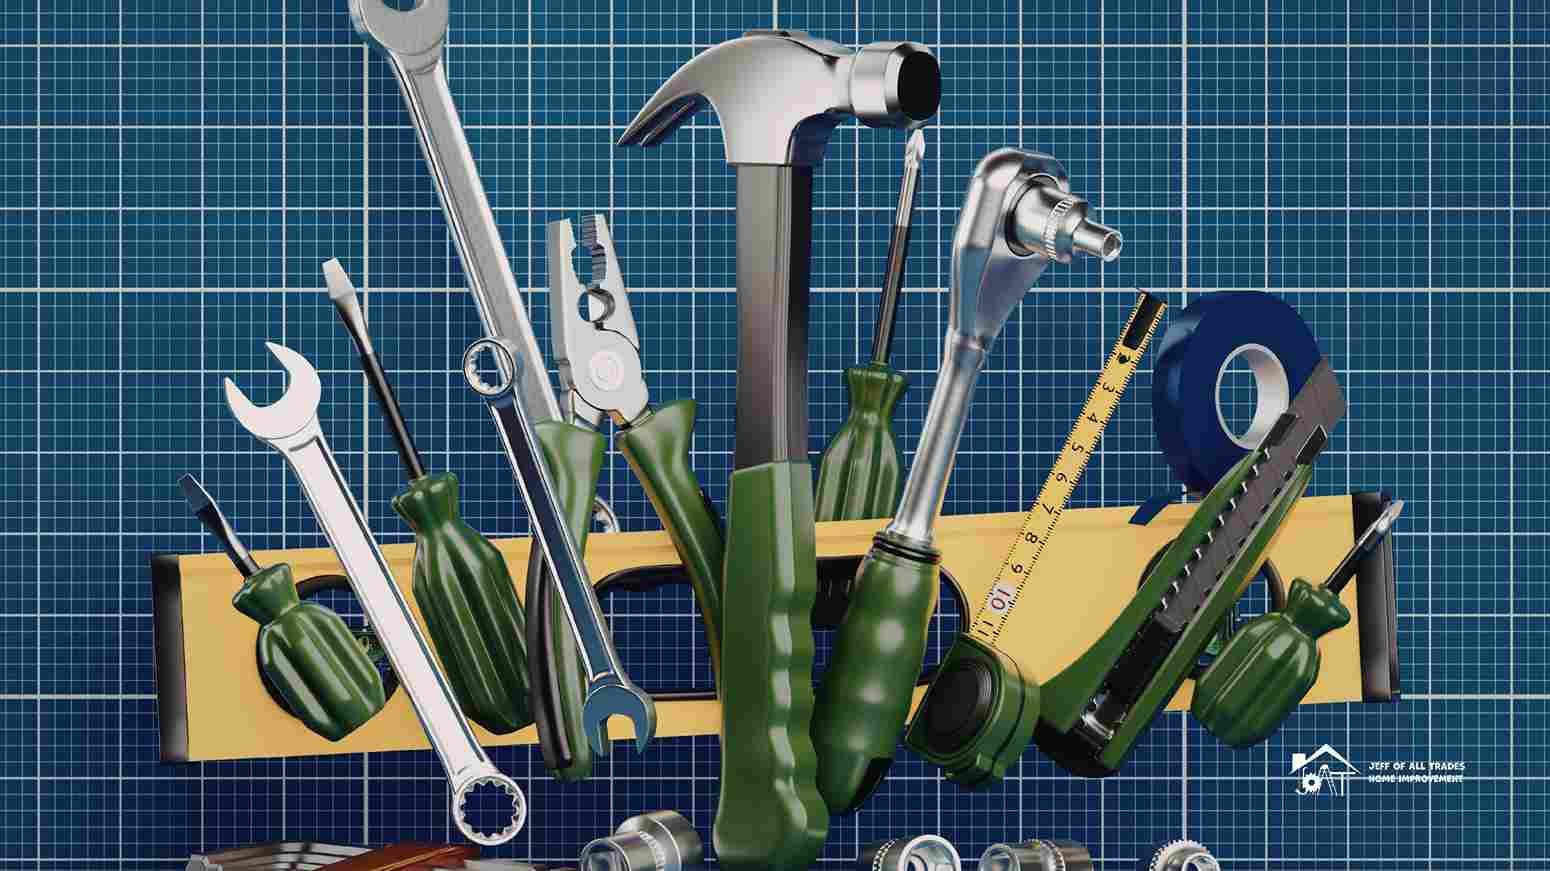
Tools and Materials You'll Need
Here's what you should gather before starting any faucet repair:
Basic Tools:
- Adjustable wrench or slip-joint pliers
- Phillips and flathead screwdrivers
- Allen wrench set (hex keys)
- Flashlight
- Old towel or rags
- Bucket or bowl
Supplies:
- Replacement washers (various sizes)
- O-rings (get an assortment kit)
- Plumber's grease
- Vinegar (for cleaning mineral deposits)
- Penetrating oil (if parts are stuck)
For cartridge or ceramic disk faucets, you might need the specific replacement cartridge for your faucet model. Take your old cartridge to the hardware store to match it up, or look up your faucet's model number online.
Most of this stuff you probably already have in your garage or basement. The replacement parts are cheap—usually under $10 for a complete washer-and-O-ring assortment. Even a brand-name replacement cartridge rarely costs more than $30-40.
Step-by-Step: How to Fix a Leaky Compression Faucet
Compression faucets are the easiest to fix because the design is so simple. Here's how to stop a dripping faucet with separate hot and cold handles:
1. Shut Off the Water
Look under your sink for shut-off valves. Turn them clockwise until they stop. If you don't have shut-off valves under the sink (common in older homes), you'll need to shut off your home's main water supply. Once the water is off, turn on the faucet to drain any remaining water in the lines.
2. Close the Drain
Put the stopper in your sink drain or cover it with a towel. You do not want to drop small screws or parts down that drain. I've fished too many parts out of P-traps over the years—learn from other people's mistakes.
3. Remove the Handle
Look for a small screw on top of the handle or hidden under a decorative cap. Pry off the cap with a flathead screwdriver if there is one, then unscrew the handle screw. Some older faucets have the screw on the side of the handle. Once the screw is out, pull the handle straight up and off. It might be stuck due to mineral buildup—wiggle it gently, or use a handle puller if you have one.
4. Remove the Packing Nut
Under the handle, you'll see a large hexagonal packing nut. Use your adjustable wrench to turn it counterclockwise. Once it's loose, unscrew it by hand and set it aside.
5. Remove the Stem
The stem is the piece that moves up and down when you turn the handle. Grab it with pliers and unscrew it counterclockwise. On some faucets, it pulls straight out; on others, it unscrews. This exposes the valve seat down in the faucet body.
6. Replace the Washer
At the bottom of the stem, you'll find a rubber washer held in place by a brass screw. Remove that screw, take off the old washer, and install a new one. Make sure the new washer is the same size as the old one. Tighten the brass screw to hold the new washer in place, but don't overtighten or you'll damage the washer.
7. Check the Valve Seat
Shine your flashlight down into the faucet body. You'll see the valve seat—a small circular piece with a hole in the center. Feel it with your finger. If it's rough, corroded, or has grooves worn into it, that's your problem. You can either replace the valve seat (some require unscrewing with a special tool) or resurface it with a valve seat dresser. For most DIY repairs, replacing it is easier if it comes out.
8. Replace O-Rings
While you have everything apart, check the O-rings on the stem. These small rubber rings create seals at various points. If they look worn, cracked, or flattened, replace them. Coat the new O-rings with plumber's grease before installing them. This helps them seal better and last longer.
9. Reassemble Everything
Put the stem back in, screw on the packing nut, reattach the handle, and replace the decorative cap. Do everything in reverse order of how you took it apart.
10. Turn the Water Back On
Slowly open the shut-off valves or main water supply. Check for leaks around the base of the faucet and from the spout. Turn the faucet on and off a few times to make sure it operates smoothly. If you still have a drip, you might need to tighten the packing nut slightly, or you may have missed a worn part.
The whole process takes 20-45 minutes, depending on how stuck things are and whether you run into surprises. It's not complicated—just methodical.
Fixing Ball-Type Faucet Leaks
Ball faucets are a bit more involved but still manageable for a DIYer. These single-handle kitchen faucets have more parts, but repair kits with everything you need are available at any hardware store.
1. Shut Off Water and Prep
Same as before—shut off the water supply and close that drain.
2. Remove the Handle
Loosen the setscrew on the side of the handle with an Allen wrench. The handle lifts off, exposing the cap and collar.
3. Remove Cap and Collar
Use adjustable pliers to unscrew the cap counterclockwise. Be careful not to scratch the finish—wrap the pliers' jaws with electrical tape. Under the cap is a cam and a cam washer. Lift these out.
4. Remove the Ball
The ball sits in the faucet body. Lift it out. Examine it for corrosion, cracks, or mineral buildup. If it's damaged, replace it. Most ball faucet repair kits include a new ball.
5. Replace Springs and Seats
Inside the faucet body, you'll see inlet holes with springs and rubber seats. Use needle-nose pliers or a screwdriver to pull out the old springs and seats. Push new ones into place. These wear out and cause leaks—always replace them.
6. Reassemble with New Parts
Install the new ball, cam, cam washer, and collar. Tighten the cap over everything. Reattach the handle and setscrew.
7. Test
Turn the water back on and check for leaks. Adjust the collar if water leaks from under the handle.
Ball faucets have a reputation for being tricky, but once you've done one, they're not bad. The key is buying a quality repair kit specific to your faucet brand.
Repairing Cartridge Faucet Leaks
Cartridge faucets are probably the most common type in modern bathrooms. Fixing them usually means replacing the cartridge.
1. Shut Off Water
You know the drill by now.
2. Remove the Handle
Take off any decorative cap to expose the handle screw. Remove the screw and pull off the handle. Some cartridge faucets have a retaining clip you need to remove first.
3. Remove the Retaining Clip
Look for a U-shaped metal clip on the front of the cartridge. Use needle-nose pliers to pull it straight out. Not all cartridge faucets have this clip, but most do.
4. Pull Out the Cartridge
Grab the cartridge stem with pliers and pull straight up. It might take some force—cartridges can get stuck from mineral buildup. Wiggle it side to side as you pull. Don't twist it or you might break it off.
5. Install New Cartridge
Before installing the new cartridge, note the orientation of the old one. Cartridges have to be inserted in a specific way, or your hot and cold will be reversed. Line up the new cartridge the same way and push it down into place. Some cartridges have ears or a flat side that must face a certain direction.
6. Replace Retaining Clip and Reassemble
Push the retaining clip back into its slot. Put the handle back on, tighten the screw, and replace the decorative cap.
7. Turn Water On and Test
Slowly turn the water back on. Test the faucet. If hot and cold are reversed, you installed the cartridge 180 degrees out of place—take it back out, rotate it, and reinstall it.
Cartridge replacement is straightforward once you've done it once. The hardest part is usually getting the old cartridge out if it's really stuck. Penetrating oil can help if you're struggling.
Fixing Ceramic Disk Faucet Leaks
Ceramic disk faucets are the most reliable design, but when they leak, it's usually from the inlet seals.
1. Shut Off Water
Same as always.
2. Remove the Handle
Loosen the setscrew and lift off the handle to expose the disk cylinder.
3. Remove the Escutcheon Cap
This is the decorative cap covering the cylinder. Unscrew it or pull it off, depending on the design.
4. Remove the Cylinder
Unscrew the mounting screws holding the cylinder in place. Lift the cylinder out of the faucet body.
5. Replace the Seals
On the bottom of the cylinder, you'll find the inlet seals—small rubber rings. Pry them out with a screwdriver and press new ones into place. Clean any mineral deposits off the cylinder while you're at it.
6. Reassemble
Put the cylinder back in place, tighten the mounting screws, replace the cap, and reattach the handle.
7. Turn the water on slowly
This is important with ceramic disk faucets. Turn the faucet to the open position first, then slowly turn the water supply back on. Sudden water pressure can crack the ceramic disks. Once water is flowing through the faucet, you can close it and proceed with testing normally.
Ceramic disk repairs are quick because there's only one component to deal with. The whole job takes maybe 15 minutes.
When a Leak Comes from the Base
If water is leaking from around the base of the faucet instead of dripping from the spout, that's usually an O-ring problem or a bad seal where the faucet meets the sink.
For O-ring issues, follow the disassembly steps for your faucet type and replace all O-rings you find. They're cheap, and replacing them all at once prevents future leaks.
If the leak is where the faucet body meets the sink, you might need to remove the entire faucet and replace the gasket or sealant. This is more work because you have to get under the sink and disconnect supply lines, but it's still doable. Apply plumber's putty or silicone sealant around the base when reinstalling.
Dealing with Mineral Buildup
Here in New Jersey, hard water is common in many areas. Those white crusty deposits on faucets and inside faucet components are mineral buildup—mostly calcium and lime.
This buildup makes parts stick, prevents proper sealing, and accelerates wear. When you take your faucet apart, clean all the metal parts thoroughly.
Soak parts in white vinegar for 30 minutes to an hour. The acid in vinegar dissolves mineral deposits. For really stubborn buildup, heat the vinegar first (don't boil it, just warm it up). After soaking, scrub with an old toothbrush.
The valve seat inside the faucet body often has mineral buildup that prevents a good seal, even with a new washer. Clean it with vinegar and a small brush or rag wrapped around your finger.
If parts are so corroded or scaled up that cleaning doesn't help, replace them. A new valve seat costs a couple of dollars. A new faucet stem might cost $10-15. It's worth replacing heavily corroded parts instead of reinstalling them.
Common Mistakes to Avoid
I've seen homeowners make these mistakes repeatedly, so learn from their experiences:
Forgetting to shut off the water. This seems obvious, but people do it. You'll flood your bathroom or kitchen. Always shut off the water first.
Losing small parts. That little screw holding the handle on is easy to drop. Work in good light, keep a bowl nearby for screws and small parts, and keep that drain closed.
Using the wrong size replacement parts. Washers and O-rings come in dozens of sizes. Bring your old parts to the hardware store to match them up. A washer that's even slightly too small or too large won't seal properly.
Overtightening everything. You don't need gorilla strength to reassemble a faucet. Overtightening can crack ceramic components, strip threads, or crush rubber parts. Snug is good enough—if it leaks, you can always tighten it a bit more.
Mixing up hot and cold. When you reassemble, make sure hot is still on the left and cold on the right. With single-handle cartridge faucets, this means installing the cartridge in the correct orientation.
Not cleaning parts before reassembly. If you put everything back together without cleaning off mineral deposits and old gunk, it won't seal properly, and you'll be right back where you started.
Forcing stuck parts. If something won't come apart, forcing it can break it. Use penetrating oil and let it sit for 15 minutes. Apply heat with a hair dryer. Tap gently with a hammer and a block of wood. Patience beats force every time.
When to Call a Professional
Most faucet leaks are DIY-friendly, but sometimes calling a pro makes sense:
If you've replaced all the washers, O-rings, and cartridges, but the faucet still leaks, there might be damage to the faucet body itself or problems with the plumbing behind the wall. That's harder to diagnose and fix.
If you can't get parts unstuck and you're worried about breaking something, call someone. A professional has the tools and experience to handle frozen components without causing damage.
If water is leaking inside the wall or you have water damage around the faucet, that suggests bigger problems. You might have corrosion in the supply lines or issues with the valve connections inside the wall. A plumber needs to check that out before it gets worse.
If your faucet is so old that replacement parts aren't available anymore, it might be time for a new faucet rather than a repair. A plumber can replace the whole unit in an hour or two.
At Jeff's Home Improvement, we handle faucet repairs and replacements throughout Somerset County. If you're in Basking Ridge, Hillsborough, Bernardsville, Bedminster, Warren, Gladstone, or Far Hills and would rather have someone else handle it, give us a call at 908-963-3533. Sometimes, the peace of mind that comes from having it done right the first time is worth the service call.
Preventing Future Leaks
Once you've fixed your leaky faucet, here's how to keep it working smoothly:
Don't overtighten when turning off faucets. Compression faucets especially don't need to be cranked down hard. Just turn until the water stops. Extra torque just compresses the washer unnecessarily and wears it out faster.
Fix drips immediately. A tiny drip today becomes a steady stream next month. Small leaks are easier to fix than big ones. Don't wait.
Clean aerators regularly. The aerator is the screen at the tip of your faucet spout. Mineral buildup here restricts flow and makes it harder to turn the faucet on, which wears out internal parts faster. Unscrew the aerator every few months, rinse it, and soak it in vinegar to remove buildup.
Address hard water. If you have significant mineral deposits throughout your home, consider a water softener. It'll extend the life of all your plumbing fixtures, not just faucets.
Replace old faucets proactively. If your faucet is 15-20 years old and starting to have issues, replacing it often makes more sense than repeated repairs. Modern faucets are more water-efficient and more durable than older ones.
The Environmental and Financial Impact
Let's put some numbers to why fixing that leaky faucet matters:
A faucet dripping once per second wastes about 5 gallons per day. That's 1,825 gallons per year from one faucet. Most homes have multiple faucets, so if you've got two or three leaking, you could be wasting 5,000 gallons or more annually.
In New Jersey, water and sewer costs vary by municipality, but you're typically paying $5-8 per 1,000 gallons, including sewer charges. That means one dripping faucet costs you about $10-15 per year. Not massive, but it adds up. Three leaking faucets could cost $30-45 annually for literally nothing—water that goes straight down the drain, unused.
Beyond your water bill, there's the environmental impact to consider. New Jersey and the Northeast in general face water supply challenges during dry years. Every gallon wasted is a gallon that has to be treated, pumped, and then treated again after it goes down your drain. That takes energy and chemicals.
Fixing leaks is one of the easiest ways to reduce your home's water consumption. The EPA estimates that household leaks waste nearly 1 trillion gallons of water annually in the US. The average home loses over 10,000 gallons per year to leaks—enough to wash 270 loads of laundry.
From a home maintenance perspective, leaks can cause damage beyond water loss. Water sitting around the base of faucets can damage countertops, cabinets, and sink bases. I've seen cabinet floors completely rotted out from small faucet leaks that dripped into the cabinet for months or years. Catching leaks early prevents much more expensive repairs down the road.
Upgrading While You're At It
If you're taking your faucet apart anyway, consider whether it's time for an upgrade:
Water-efficient faucets have aerators that reduce flow to 1.5 gallons per minute or less while maintaining good pressure. They can cut your water use by 30% compared to older faucets that flow at 2.2 GPM or more. The savings add up—a family of four can save thousands of gallons of water each year.
Pull-down or pull-out kitchen faucets make kitchen tasks easier if you're still using a standard faucet. The convenience is worth considering if your current faucet is old.
Touchless faucets are great for keeping things cleaner, especially in kitchens where you're handling raw meat. No more touching faucet handles with dirty hands.
Better finishes resist water spots and corrosion better than chrome. If your area has hard water, finishes like brushed nickel or oil-rubbed bronze hide water spots better and last longer.
Faucet prices range from $50 for basic models to $300+ for high-end designer faucets. You can get a solid, reliable faucet from a good brand like Moen, Delta, or Kohler for $100-150. Installation is straightforward if you're comfortable with basic plumbing, or we can handle it for you as part of our handyperson services.
What About Outdoor Faucets?
Outdoor faucets (hose bibs) leak too, and the fix is similar to that of indoor compression faucets:
Shut off the water supply to the outdoor faucet. This is usually a valve inside your basement or crawl space. Unscrew the packing nut behind the handle, remove the stem, and replace the washer at the end just like with an indoor compression faucet.
The added concern with outdoor faucets is freezing. A leaking outdoor faucet can freeze in winter and burst the pipe inside your wall. That's an expensive repair. If you notice your outdoor faucet dripping, fix it before winter hits.
Consider upgrading to a frost-free hose bib if you're replacing an outdoor faucet. These have a long stem that shuts off the water deep inside the wall, where it's warmer, preventing freeze damage.
Special Considerations for Different Rooms
Kitchen Faucets: These get the most use and are most prone to wear and tear. The constant temperature changes (hot water for dishes, cold for drinking) also stress the internal seals. Kitchen faucet repairs are the same as bathroom faucets; just be aware that kitchen faucets often have heavier, more complex designs with sprayers and additional connections.
Bathroom Sink Faucets: Usually simpler than kitchen faucets. The techniques covered earlier apply directly. One thing to watch for: widespread bathroom faucets (where the handles are separate from the spout) have supply lines connecting the handle and spout. These connections can leak, too. Check them when you're investigating a leak.
Tub and Shower Faucets: These use similar internal components, but accessing them is harder because they're inside the wall. The repair process is the same—replace washers, cartridges, or O-rings—but you're working in a more confined space. If you can't stop a tub or shower leak with the techniques here, it might be worth calling a plumber because accessing some shower valves requires cutting into the wall.
Related Home Improvement Projects
While we're talking about water conservation and home maintenance, consider these related projects:
Fix Running Toilets: A running toilet wastes even more water than a dripping faucet—sometimes hundreds of gallons per day. It's usually a simple replacement of the flapper or fill valve.
Check for Hidden Leaks: Look at your water meter before going to bed. Don't use any water overnight, then check the meter in the morning. If it moved, you leak somewhere. Could be faucets, toilets, or pipes. Finding and fixing hidden leaks saves serious money.
Update Old Plumbing Fixtures: If your home still has original fixtures from the 80s or 90s, modern replacements use much less water. The investment pays for itself in water savings over a few years.
We handle all kinds of home improvement work beyond just plumbing. Whether you need bathroom remodeling, kitchen updates, or general damage repair, Jeff's Home Improvement has you covered throughout Somerset County.
FAQ: How to fix a leaky faucet
Q: How much water does a leaky faucet actually waste?
It depends on how fast it's dripping. A slow drip—one drop per second—wastes about 5 gallons per day or roughly 2,000 gallons per year. That's enough water for 40 showers. A faster drip, say one drop every few seconds, can waste 30-50 gallons daily. That adds up to over 15,000 gallons per year from just one faucet. If you've got multiple faucets dripping, you could easily waste 20,000-30,000 gallons annually.
Q: Can I use any washer or O-ring to fix my faucet, or do I need specific ones?
Size matters with washers and O-rings. They need to fit exactly right to create a proper seal. Washers come in different diameters and thicknesses—even a 1/16-inch difference can mean it won't seal properly. O-rings vary even more in size and thickness. Your best bet is to take the old parts to the hardware store and match them up with the replacement parts there.
Q: I fixed my faucet, but it's still dripping—what did I do wrong?
A few possibilities here. First, check that you replaced all worn parts, not just some of them. Sometimes a faucet needs both a new washer and new O-rings, or the problem is actually with the valve seat rather than the washer. If you replaced the washer but didn't check the valve seat for damage or corrosion, that could be your issue. Second, make sure the new parts are installed correctly, and everything is reassembled in the right order. It's easy to forget a part or put things back together wrong.
Stop That Drip Today
That annoying drip from your faucet is costing you money right now. Every day you put off fixing it is another day of wasted water and higher bills. The good news is that fixing a leaky faucet is one of the easiest plumbing repairs you can do. With basic tools, cheap replacement parts, and an hour of your time, you can stop the leak and start saving.
For homeowners in Basking Ridge, Hillsborough, Bernardsville, and throughout Somerset County, Jeff's Home Improvement is here to help, whether you want to tackle the repair yourself or have us handle it. We're locally based, fully licensed (NJHIC LIC #13VH06643500), and we've been solving home improvement problems for years. A faucet repair is a quick job for us—usually done in under an hour—and our rates are reasonable.
Don't let a leaky faucet waste thousands of gallons of water and your hard-earned money. Fix it today, or give us a call at 908-963-3533 and we'll take care of it for you. Your water bill will thank you, and you'll sleep better knowing you're not literally pouring money down the drain every night.