Shed Waterproofing Products to Survive Harsh NJ Snow Melt
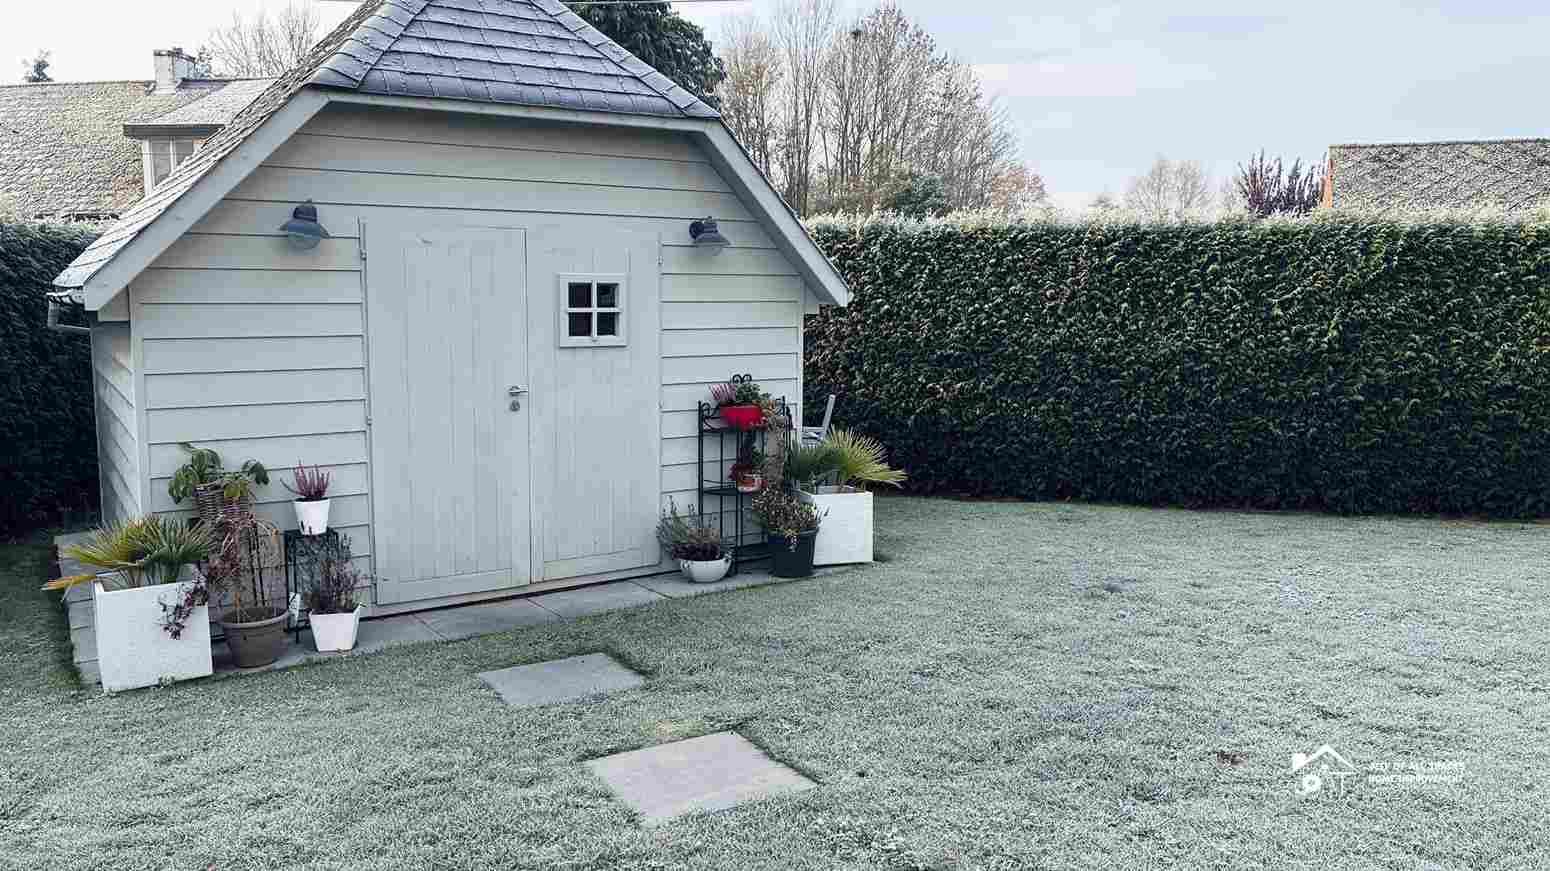
If you've got a shed in your New Jersey backyard, you know what happens every spring. That beautiful blanket of snow turns into your shed's worst enemy. The freeze-thaw cycles we get here in Somerset County are brutal on outdoor structures. One day it's 35 degrees and melting, the next it drops to 20 and everything freezes solid again. Your shed takes a beating.
I'm Jeff, and through my work with Jeff's Home Improvement, I've seen what New Jersey winters do to sheds and outdoor structures across Basking Ridge, Hillsborough, Bernardsville, and the surrounding areas. Water finds every crack, every gap, every weak point. It seeps in during the day when things melt, then freezes at night and expands. That expansion splits wood, cracks concrete, ruins floors, and turns a perfectly good shed into a rotting mess in just a few seasons.
The good news? Proper shed waterproofing for winter will protect your investment and keep your stored belongings dry year after year. Today, I'm walking you through exactly which waterproofing products work, how to apply them, and how to protect your shed from the unique challenges of northeastern winters.
Why New Jersey Winters Are Especially Hard on Sheds
Let's talk about what makes our winters so destructive. It's not just the cold, it's the constant temperature swings.
In places like Minnesota or upstate New York, it gets cold in November and stays cold until March. Snow falls and sits there frozen solid for months. That's actually easier on structures than what we deal with here in New Jersey.
Our winters hover around the freezing point. We'll get a snowstorm that dumps 8 inches, then two days later it's 45 degrees and sunny. Everything melts. Water runs everywhere, off your roof, down your walls, across your shed floor. Then, that night, it drops back to 25 degrees, and all that water freezes.
Water expands about 9% when it freezes. That's enough force to crack concrete, split wood, and pop nails out of their holes. Every freeze-thaw cycle damages your shed a little more. By the end of winter, small problems become big ones.
We also get ice dams. Snow on your shed roof melts from underneath (heat escapes through the roof), runs down to the cold eaves, and refreezes. This creates an ice dam that traps water behind it. That trapped water has nowhere to go but under your shingles or through any gaps it can find.
The ground around your shed goes through the same freeze-thaw cycle. When the ground freezes, it expands and can push against your shed foundation. When it thaws, everything settles, sometimes unevenly. This movement creates cracks and gaps that let water in.
Add in the fact that many sheds sit directly on the ground or on a basic gravel pad, and you've got a recipe for water damage. Without proper waterproofing, your shed won't last more than 5-7 years in New Jersey weather.
Common Shed Water Damage Problems
Before we get into solutions, let's identify what we're fighting against. Here are the water problems I see most often:
Roof Leaks: The most obvious issue. Snow piles up, melts, and finds any weak spot in your roofing. Missing shingles, worn sealant around nails, gaps in flashing, water finds them all. Once water gets through the roof, it damages rafters, walls, and everything stored inside.
Floor Rot: This is huge. Most shed floors are just plywood or OSB. When snowmelt pools around your shed and seeps beneath it, the floor absorbs moisture like a sponge. Within a couple of years, you've got soft spots. Within five years, you're stepping through the floor. I've seen shed floors so rotted you could push your finger right through them.
Wall Water Damage: Water runs down the sides of your shed during snow melt. If your siding isn't sealed properly, water gets behind it and rots the wall framing. You don't see this damage until you've got holes or the siding is falling off.
Foundation Issues: Concrete piers or blocks can crack from freeze-thaw cycles. Wood foundations rot when they're in contact with wet ground. Even gravel foundations can wash away over time, causing the shed to settle unevenly.
Door and Window Leaks: Snow piles up against doors and windows. When it melts, water seeps through any gaps in the seals. You end up with water on the floor and damaged door frames.
Mold and Mildew: All that moisture creates the perfect environment for mold. Once mold starts growing inside your shed, it's hard to get rid of. It ruins stored items and makes the whole shed smell musty.
Rust and Corrosion: Any metal hardware, hinges, door handles, or tool hooks rust quickly in damp conditions. Metal roofing can rust through. Metal siding develops holes.
Every one of these problems is preventable with the right waterproofing approach. Let's get into the solutions.
The Best Shed Waterproofing Products for Roofs
Your roof is the first line of defense, so we'll start there.
Asphalt Shingles with Ice and Water Shield
If you're building a new shed or replacing an old roof, architectural shingles are your best bet for New Jersey weather. But here's the key: under those shingles, install ice-and-water shield across the entire roof deck, not just the eaves.
Ice-and-water shield is a rubberized, self-adhesive membrane. It sticks to your plywood roof deck and creates a completely waterproof barrier. Even if water gets under your shingles (which it will eventually), the ice-and-water shield prevents it from penetrating further.
Most people only apply ice-and-water shield to the bottom three feet of the roof. That's fine for houses, but for sheds, especially smaller sheds, cover the whole roof. It only costs an extra $50-100, and it makes your roof essentially bulletproof against leaks.
Good brands: Grace Ice and Water Shield, GAF StormGuard, Owens Corning WeatherLock. Any of these will work great.
Metal Roofing
Metal roofing is increasingly popular for sheds, and for good reason. It sheds snow and water better than shingles, lasts 40+ years, and requires almost no maintenance.
For waterproofing metal roofing, the key is proper installation. Use the right screws with rubber washers, seal all seams with butyl tape before overlapping panels, and make sure your roof pitch is adequate (at least 3:12, preferably steeper).
Apply a bead of polyurethane roof sealant (such as Geocel or DAP) along the edges of panels where they overlap. This creates an extra water barrier. Also seal around any penetrations, vents, screws, and ridge caps with the same sealant.
Rubber Roofing Membrane (EPDM)
For flat or low-slope shed roofs, EPDM rubber roofing is excellent. It's the same material used on commercial flat roofs. It comes in large sheets that you glue down, creating one continuous waterproof surface with minimal seams.
EPDM handles freeze-thaw cycles well, remains flexible in cold weather, and lasts 25-30 years. The main downside is that installation takes some skill. You need to clean and prime the roof deck properly, apply the adhesive evenly, and carefully seal any seams with special tape and sealant.
Brands like Firestone, Carlisle, and GenFlex make quality EPDM. For a typical 10x12 shed, you're looking at $200-300 in materials.
Roll Roofing
For budget-conscious folks, mineral-surface roll roofing works well. It's essentially the same material as shingles, but in 3-foot-wide rolls instead of individual shingles. You roll it out, overlap the seams by 6 inches, and nail it down with roofing nails and sealant.
It's not as durable as shingles or metal, and it's expected to last 10-12 years, but it's cheap and easy to install. Make sure to use plenty of roofing cement under the overlaps to ensure a complete seal.
Liquid Rubber Coating
If you have an existing shed roof that's sound but not quite waterproof enough, liquid rubber coating is a great option. Products like Liquid Rubber or Henry's Rubberized Coating go on like thick paint and dry to form a seamless rubber membrane.
Clean your roof thoroughly, prime any porous surfaces, then apply two coats with a roller or brush. Pay special attention to seams, edges, and any penetrations. This creates a new waterproof layer right over your existing roof.
This is also a good solution for fixing minor leaks without replacing the whole roof. It costs $100-150 per gallon, and one gallon typically covers 50-60 square feet per coat.
Waterproofing Shed Walls and Siding
Water doesn't just attack from above; it also comes at your walls from the sides and splashes up from the ground.
Exterior Wood Sealers
If your shed has wood siding (T1-11, plywood, or board-and-batten), sealing it properly is critical. Raw wood absorbs water like crazy, leading to rot, warping, and mold.
Use a penetrating wood sealer or stain, not just paint. Sealers like Thompson's WaterSeal, Olympic Maximum, or Ready Seal soak into the wood and repel water from within the wood. They also allow the wood to breathe, so moisture that does get in can escape rather than being trapped behind a painted surface.
Apply two coats to bare wood, paying extra attention to the bottom few inches where water splashes up from the ground. Reapply every 2-3 years to maintain protection.
If you prefer painted siding, use a quality exterior primer first, then two coats of 100% acrylic latex paint. Cheap paint fails quickly in our weather. Brands like Behr Premium, Sherwin-Williams Duration, or Benjamin Moore Aura are worth the extra cost.
Vinyl and Metal Siding
Vinyl siding is naturally waterproof, but water can get behind it if it's not installed correctly. Make sure there's a weather barrier (Tyvek or similar) under the siding. Check that J-channels around doors and windows are properly sealed with silicone caulk.
Metal siding sheds water well but needs proper overlap and sealing at the seams. Use butyl tape under overlaps and polyurethane sealant on exposed edges.
Foundation-to-Wall Seal
Where your shed walls meet the foundation is a critical point for waterproofing. Water running down your walls hits this joint and tries to get in.
Apply a heavy bead of polyurethane sealant (like Sikaflex or Lexel) along the entire perimeter where the bottom wall plate meets the foundation. This flexible sealant stays effective through temperature changes and foundation settling.
For extra protection, install metal flashing between the foundation and wall. The flashing directs water away from the joint. This is especially important if your shed sits close to the ground.
Drip Edge and Kick-Out Flashing
Install drip edge along the bottom of your siding, especially on the gable ends. This directs water away from the wall so it doesn't run down onto the foundation or splash back up.
At the bottom of wall sections, add a small piece of metal flashing (called a "kick-out") that extends past the wall surface. This throws water away from the building rather than letting it drip straight down.
Protecting Your Shed Floor from Water Damage
Floor rot is one of the most common and expensive shed problems. Here's how to prevent it.
Proper Foundation
Start with a foundation that keeps your shed floor off the ground. The worst thing you can do is set your shed directly on dirt. Water from the ground will wick up into the floor constantly.
Options from best to worst:
- Concrete slab with vapor barrier: Pour a 4-inch concrete slab over compacted gravel with a 6-mil plastic vapor barrier underneath. This is the gold standard but costs $500-1000+, depending on shed size. The concrete keeps your shed completely dry and provides a solid, level floor that will last forever.
- Concrete piers or blocks: Set concrete blocks or poured piers every 4 feet to support the shed frame. This elevates the floor 6-8 inches off the ground, allowing air circulation underneath. Cost: $100-200. Make sure the ground under and around the blocks slopes away from the shed.
- Gravel pad: Spread 4-6 inches of compacted gravel larger than your shed footprint. Set pressure-treated 4x4 skids on the gravel to support the floor. This elevates the shed slightly and provides drainage. Cost: $50-150. It's better than nothing, but not as good as blocks or concrete.
Floor Construction
Use pressure-treated lumber for all floor components that might contact moisture, such as skids, floor joists, and rim joists. Regular lumber rots quickly; pressure-treated lumber is worth the extra cost.
Floor Waterproofing
Even with a good foundation, waterproof your floor for extra insurance:
- Before installation: Before you install the floor deck, paint the bottom (underside) with two coats of deck stain or sealer. This prevents moisture absorption from below.
- After installation: Once the floor is down, seal all the seams with exterior caulk, then paint or stain the entire top surface with a deck sealer or porch paint. This prevents water tracked in or leaking through the roof from soaking into the floor.
- Sill seal: Between your foundation (blocks, piers, or concrete) and the shed floor frame, install sill seal foam. This compressible foam creates a moisture barrier and prevents water from wicking up into the wood through capillary action.
Drainage Around the Shed
Keep water away from your shed foundation with proper grading and drainage:
- The ground should slope away from the shed on all sides. Water should flow away from the building, not toward it.
- If your yard is flat or the shed is in a low spot, dig a shallow swale (ditch) to direct water around it.
- Install a small gravel trench around the perimeter if you have drainage problems. The gravel provides a place for water to go rather than pooling against the foundation.
- Clean gutters and downspouts in the spring and fall if your shed has them. Clogged gutters dump water right at the foundation.
Door and Window Weatherproofing
Doors and windows are weak points. Snow piles up against them, and water finds its way through.
Door Weatherstripping
Replace or add weatherstripping around your shed door. The foam or rubber strips compress when you close the door, creating a seal. Over time, they compress permanently or tear, and they stop sealing.
Use heavy-duty weatherstripping designed for exterior doors, not the cheap foam tape. Brands like Frost King and MD Building Products make good products that last for several years.
Pay special attention to the bottom of the door. Install a door sweep or threshold seal to keep water from running under the door.
Door Threshold
Suppose your shed doesn't have a raised threshold (most don't), add one. A simple aluminum or rubber threshold raises the bottom edge of the door opening an inch or two, preventing water from flowing in when snow melts around the door.
You can also build a small ramp or step outside the door to elevate the entrance. This keeps snow from piling directly against the door.
Window Sealing
Caulk around window frames where they meet the shed walls. Use a flexible, paintable exterior caulk like DAP Alex Plus or GE Supreme. Remove old, cracked caulk first, clean the surface, then apply a smooth bead.
For single-pane windows, consider adding storm windows or replacing them with insulated windows. This reduces condensation (which causes moisture problems inside) and provides better protection against driven snow.
Flashing
Install metal flashing above doors and windows. This overhanging piece of metal directs water away from the opening so it doesn't drip down into the frame. Many sheds skip this step, but it makes a huge difference.
The flashing should extend out at least 2 inches past the wall and have a drip edge bent down on the front to throw water clear.
Preventing Ice Dams on Shed Roofs
Ice dams form when snow on your roof melts and refreezes at the eaves. The dam traps water, which backs up under the shingles and leaks in.
Insulation and Ventilation
Heat escaping through your roof causes snow to melt unevenly. If your shed is heated or insulated, make sure you have adequate ventilation:
- Install ridge vents or gable vents to let warm air escape from the peak.
- Add soffit vents at the eaves to draw cool air in.
- Insulate the ceiling (not the roof deck) to prevent heat from reaching the underside of the roof.
For unheated sheds, ventilation is less critical, but it still helps by keeping the attic space close to outside temperature so snow melts evenly.
Roof Pitch
Steeper roofs shed snow better and are less prone to ice dams. If you're building a new shed, aim for at least a 6:12 pitch (6 inches of rise for every 12 inches of run). Shallower roofs hold snow and accumulate ice.
Ice and Water Shield
I mentioned this earlier, but it's worth repeating. An ice-and-water shield membrane under your shingles is the best protection against ice-dam leaks. Even if an ice dam forms, the membrane prevents water from getting through.
Install it at a minimum on the bottom 3 feet of the roof on all edges. For complete protection, cover the entire roof deck.
Heating Cables
For sheds in particularly snowy spots or with shallow roofs, consider installing roof heating cables. These electric cables clip to your roof edge and plug in during winter. They create channels for meltwater to escape, preventing ice dam formation.
They use electricity, so there's an operating cost, but it's minimal, usually a few dollars per month during winter. Products like Frost King or Easy Heat cost $50-100 for enough cable for a typical shed.
Interior Moisture Control
Waterproofing isn't just about keeping water out; it's also about managing moisture inside your shed.
Vapor Barriers
If you're building a new shed or finishing the interior, install a vapor barrier on the warm side of the walls (the interior side in a heated shed). Six-mil plastic sheeting works, or use foil-faced foam board insulation, which acts as both insulation and a vapor barrier.
This prevents warm, moist air from entering the wall cavity, where it could condense and cause rot.
Ventilation
Even unheated sheds need some air exchange to prevent moisture buildup. Install small vents near the roof peak; one on each gable end is usually sufficient. This lets humid air escape.
In heated sheds, consider a small exhaust fan on a timer or humidistat to remove excess moisture.
Ground Vapor Barrier
If your shed has a dirt floor or you've set it on blocks with exposed ground underneath, lay down a 6-mil plastic vapor barrier on the ground. This prevents moisture from evaporating up into your shed.
Overlap the seams by 12 inches and weigh down the edges with gravel or dirt. This simple step dramatically reduces humidity inside the shed.
Dehumidifier
For valuable storage or workshop sheds, running a small dehumidifier during humid months makes a big difference. You can get away with this in summer, but in winter, when things freeze, unplug it or drain it regularly so it doesn't freeze up.
Maintenance Schedule for Year-Round Protection
Waterproofing isn't a one-time job; it requires regular maintenance to stay effective.
Spring (April-May):
- Inspect the roof for winter damage, loose or missing shingles
- Check for and repair any leaks
- Clean gutters and downspouts if you have them
- Inspect the foundation for cracks or settling
- Check caulking around windows and doors
- Apply exterior wood sealer if needed (every 2-3 years)
- Verify ground slopes away from the shed on all sides
Summer (June-August):
- Check for signs of moisture damage inside, mold, soft spots, and a musty smell
- Repair or replace any damaged siding
- Touch up paint or stain where needed
- Ensure door and window seals are intact
Fall (September-November):
- Re-inspect the roof before winter
- Clean gutters again
- Replace worn weatherstripping
- Remove items stored directly on the floor (elevate on shelves or pallets)
- Check that doors close tightly and latches work
- Trim back any vegetation touching the shed (holds moisture against walls)
- Make sure foundation drainage is clear
Winter (December-March):
- After heavy snow, brush excess snow off the roof if it's safe to do so
- Keep paths to doors clear
- Check for ice dam formation
- Watch for signs of leaks after thaw periods
This maintenance takes maybe an hour per season, but it extends your shed's life by years and prevents expensive repairs.
When to Replace vs. Repair
Sometimes, waterproofing and repairs aren't enough. Here's when it makes more sense to replace your shed:
Replace if:
- The floor is rotted beyond repair (more than 30% of the floor is soft or has holes)
- The roof structure has multiple failed rafters or extensive water damage
- The walls are out of square by more than 2 inches (indicating foundation failure)
- More than half the siding needs replacement
- The shed is over 20 years old and has had multiple major repairs
- Repair costs exceed 60% of the cost of a new shed
Repair if:
- Damage is localized to one area
- The structure is still square and solid
- The floor and roof framing are sound
- You're catching problems early before they spread
- The shed is less than 15 years old
As someone who does both damage repair and new construction, I can tell you that catching problems early always saves money. A $200 repair today prevents a $2,000 replacement in three years.
DIY vs. Professional Help
Most shed waterproofing is DIY-friendly if you're reasonably handy. Sealing, painting, caulking, and basic repairs are straightforward.
Consider professional help for:
- Major roof replacement
- Foundation repair or releveling
- Significant structural damage
- Extensive floor replacement
- Siding replacement on larger sheds
At Jeff's Home Improvement, we help homeowners throughout Basking Ridge, Hillsborough, Bernardsville, Bedminster, Warren, Gladstone, and Far Hills with shed repairs and waterproofing. Sometimes it makes sense to call in someone who has the tools and experience to do it quickly and correctly. We also handle related work, such as custom walkways to improve drainage around your shed.
If you're not sure whether to repair or replace, or you want an expert opinion on your shed's condition, give us a call at 908-963-3533. We'll take a look and give you an honest assessment. Sometimes it's a simple fix, sometimes it's time for a new shed. Either way, we'll help you figure out the best solution for your situation and budget.
FAQ
Q: How often should I reseal my shed, and what are the signs it needs resealing?
You should reseal or restain wood sheds every 2-3 years for best protection. For high-quality sealants and stains, you might stretch it to 4 years, but no longer. Signs your shed needs resealing include water absorbing into the wood rather than beading up on the surface, fading or graying of the wood color, visible cracks or peeling in the previous coating, and dark spots or discoloration indicating moisture penetration.
Q: Can I waterproof my shed in winter, or should I wait until spring?
Ideally, wait until spring for major waterproofing projects. Most sealants, paints, and adhesives require temperatures above 50°F to cure properly. Apply them in cold weather, and they won't bond correctly or may not dry at all. You'll just waste time and money. However, you can do emergency repairs in winter if you have active leaks causing damage. Use cold-weather formulated products like Liquid Nails Heavy Duty in the red tube (works down to 22°F) or Sikaflex 11FC (works to 25°F). Polyurethane caulks generally perform better in cold weather than latex.
Q: What's the most cost-effective way to waterproof an old shed that's starting to show wear?
For an aging shed with minor issues, start with the highest-impact, lowest-cost fixes first. Begin by addressing roof leaks since water from above causes the most damage. Apply a liquid rubber coating over your existing roof ($100-150 for materials) rather than doing a full roof replacement ($800-1500 professionally). This buys you several more years for a fraction of the replacement cost. Next, seal the foundation-to-wall joint all the way around with polyurethane caulk ($20-30). This single step prevents a huge amount of water intrusion. Then apply a penetrating wood sealer to all exposed wood surfaces ($100-200 for 5 gallons to do an average shed).
Don't Let Another Winter Destroy Your Shed
New Jersey winters are tough on sheds, but they don't have to be. With the right waterproofing products and techniques, your shed will handle snow, ice, and freeze-thaw cycles year after year without deteriorating.
The key is addressing problems before they become major. That small roof leak you're ignoring? It's rotting your rafters right now. Those gaps around the foundation? Water is seeping in with every snowmelt, rotting your floor. Take care of it now while it's still a simple fix.
Whether you tackle the waterproofing yourself or hire it out, the investment is worth it. You're protecting stored tools, equipment, lawn mowers, bikes, and probably thousands of dollars' worth of stuff. You're also protecting the shed itself, which costs you $1,500-3,000 to buy or build. Spending $300-500 on waterproofing to protect a $2,000+ investment is just smart home maintenance.
For homeowners in Somerset County, Basking Ridge, Hillsborough, Bernardsville, Bedminster, Warren, Gladstone, and Far Hills, Jeff's Home Improvement is here to help with all your shed waterproofing and repair needs. We also handle related services, such as exterior painting and handyman work, to keep your entire property in top shape.
Give us a call at 908-963-3533 or email jeffofalltradeshandymanservice@gmail.com for a free estimate. We'll inspect your shed, identify any problem areas, and provide a clear plan and a fair price to get everything waterproofed and protected before the next winter hits. Don't wait until your shed is falling apart; let's take care of it now while the fixes are still simple and affordable.